Monday, October 31, 2016

Days 12 and 13: Bathroom Remodel

Much has changed in the last two days.  When dreams hit reality, the collision sometimes creates painful results.

We were fairly sure that we had found the solution to our bathtub wall problems when we left the design studio on Saturday.  We would go with the Kohler Choreograph Cord for the walls, and all would be good.  Then on Sunday after church, we did some further research...

Our choice always has been between Swanstone (now just called "Swan") and Choreograph.  A drawback of the Swan is that while it is durable, it can crack.  Online videos shows a man taking a hammer and beating on one corner of the Choreograph, and nothing happens-- no cracks, no dents, nothing.  Yet further research shows that while the Swan gets very good reviews, the Choreograph also offers a repair kit.  If the product is that indestructible, why would one need a repair kit?

Both products are incredibly heavy and probably would take an installation crew to complete the job. What Rick and I once thought we could do, we no longer believe we can.  Reality is that I am not very strong, and we have a very tight space into which we would have to install the walls.

Further research revealed that the plain white Swan is more expensive than the plain white Choreograph, but if I want the Cord wavy texture, the Choreograph list price jumps a hefty $700 more.  Ouch!  Reality is expensive.

Another contrast was with the trim.  The plain white Swan has better trim pieces (edges) while the Choreograph seemed to have better corners; however, the trim on the Choreograph just somehow looked cheaper, and Rick was afraid that the finish would wear off since the Choreograph corners and trim were not of the same material as the walls themselves. Swan means visible caulk, but Choreograph means possible poor finishes.

And finally, there is the warranty.  This was the deal breaker for us without even getting a final price quote.  The Swan has a limited lifetime warranty, while the Choreograph has a limited 10-year warranty.  "If I wanted a 10-year warranty, I would have installed the acrylic cheap piece of crap," said Rick. Since Choreograph is so new, Sarah at the design center told us that their crews have not yet installed it, so our work would be the first.  That did not give either of us a warm boost of confidence that the result would be to our liking.

In the end, we are not happy with the look that either the Swan or the Choreograph will give the bathroom, so we have eliminated both options.  With what does that leave us?  The one option that I vowed after our last horrific experience, I would never go with: tile.

Today started with sanding down the second plaster job of Sunday.  We did this early because we had other plans for the day.

Once showered and presentable, we headed for Clearwater to vote early. We only had a few people in line in front of us, so voting did not take very long.  I just wish I had had a candidate in whom I really believed.  I told Rick that I wanted an Obama/ Biden ticket: Michelle Obama for President, and Dr. Jill Biden for Vice-President.  Then we would have two well-educated, intelligent, articulate, level-headed, honest, compassionate, non-career-politicians who might actually be able to accomplish some good in this world. I settled for voting on Halloween in probably the scariest election of my life.

After voting, we made a quick daily sojourn to Home DePot for more shop vacuum bags.  How quickly the bags fill during construction!  Then we went back to the design center to talk to Sarah.

When we got there, we were informed that Sarah had just left for a start-up.  We decided rather than waiting, we would get some lunch and then get paint samples at the store.  We had a quick, almost-adequate lunch at Arby's.  Sarah called just as we were entering the parking lot.  She told us that her day was crazy-busy, but if we wanted tile, our next step was to have her come to the house and measure the tub opening.

We were disappointed because we really wanted to see some tile samples, and Rick is very uncomfortable giving up control to a decorator.  However, if there are problems with the job, then the hassles also go to the decorator and not back on us.
Our two choices were creamy beige and melon popsicle.

Our final stop was to the paint store to pick up samples of paint.  I wanted to go with an orange/coral color without having it turn pink again on us.  We chose two shades that we thought might work.  Rick painted two sample panels; we put a sample of white tile from our master bathroom next to them, and we are not thrilled with either result.  The coordinating colors lead us back to rust-colored accents, and that is what we have in Wisconsin. I want Gladys to be different.
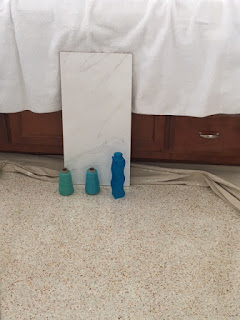
Trying to see how white tile and blue towels
and accents would go with off-white walls
and cherry vanity.  Unsure...

Then we tried variations on blue/ aqua/ turquoise. While those shades may work, I am concerned that the walls would have to be an off white which may clash with the windows and/ or tile, and the blues themselves may clash with the floors. And if the shade of aqua or blue is too intense, I would grow tired of it quickly.  The idea of having a decorator come to help us is sounding better all of the time.
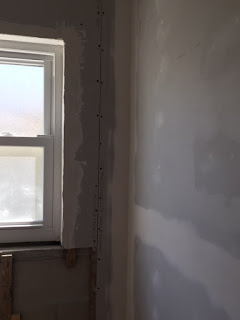
A rough start helps the window take shape.
After a little work, the window now has a corner!

Rick's final project of the day (yes, he does not know when to stop!) was to add drywall around the top and sides of the window and to masterfully build up the front rough-plaster edges of the window so we have a smooth transition between finished wall and inset window.  They will take some work, but the first pass at getting them integrated back into the room looks great.

We have made so many decisions and changes in the last 48 hours that my head is swimming.  Sarah is coming on November 3 to take a look at the bathroom and to get dimensions.  I hope that we will be able to get some good direction from her at that time. For now, I need to Advil to help alleviate my headache.


Saturday, October 29, 2016

Day 11: Bathroom Remodel

I always am amazed at the dozens of details that need to be coordinated to put a room together.  We took another step today down the trail to a finished bathroom.

Rick does not know how to take a day off, so he was dressed in work clothes and in the garage mixing mud for the walls before I even had my teeth brushed!  Rather than using the pre-mixed buckets of mud for the walls, he decided to try the powered variety that we just mix with water.  Since we already had the big mixer that attaches to his drill from a previous job, this was worth a try. He felt that by mixing the mud himself, he got a much more spreadable result, and I think that the finished product looks better too.  Perhaps we will not have to do quite so much sanding with this mudding job.
A polka-dotted wall means that we have progress!
The corner by the two doors is always a challenge.

After he had the first coat of mud on the walls, Rick took time to stuff insulation in the dug out portion of the exterior wall that used to house the toilet paper holder.  The new holder will be mounted to the wall, so we have no need for the recess in the structure.  Once the hole was filled with insulation, Rick added boards in it to provide a backing onto which we can mount the new vertical toilet paper holder.  We have vertical holders in our house in the north, and we love them.  They have no parts to take out, nothing to roll across the wall, and the actual toilet paper can be put on the holder by simply dropping it onto the vertical post.  We have one in the master bathroom here, and I would never go back to the old-fashioned horizontal holder.
A board covers the alcove that used to house the
toilet paper holder.
A vertical toilet paper holder means I just
need to drop a new roll on when the old one
is gone.

As long as Rick was working with insulation, he also took the time to replace all of the insulation that fell from the ceiling when we removed the soffit.  We had saved five bags of insulation which I handed up to him as he stood on the ladder up to the attic.  I don't know how much more R-factor the replaced insulation will give to the house; I am just glad that I do not have to walk around the bags in the garage anymore.

After lunch we took a trip to Palm Harbor to visit a kitchen and design center.  They actually sell the Kohler Choreograph solid surface bathtub walls, and the woman I talked to said that they had samples.  We learned that we do still need to put hardi-board behind the walls, but they have a unique corner system which is waterproof and shows no visible signs of caulking.

The system is impressive.  We also learned that Kohler recommends that three men install their product since the walls are so heavy.  I like the system because the walls are very sturdy, but they still are in one piece, so they have no grout lines to scrub or caulk lines to mold.

Our bathtub is white, and we want to stay with white walls also.  We decided to get a quote for a wall with a gently wavy structure called Cord.  Since the walls are so heavy, we also will get a quote for installation.

Will the price be a heart-stopper?  Perhaps.  We did not intend to spend this much on bath tub walls, but we want something that is waterproof, easy to clean, and durable.  I guess if we want quality, we have to be willing to pay for it.

Friday, October 28, 2016

Day 10: Bathroom Remodel

Money, money, money, money.  Somehow Rick must have bumped and cut his wallet while doing the remodeling because suddenly it is bleeding money at an alarming rate.  I hope it does not die before we complete the rebuild on this bathroom.

The bear was back in our bedroom last night, so from 2:30 onward I was back on the couch.  I hope that when the bathroom is finished, the bear isn't quite so loud.  I need my beauty sleep! Yes, I realize that a good night's sleep will not do much for my overall appearance, but it will keep me from having a very, very ugly mood.
The second layer of drywall brings the wall flush
with the door jambs.

We started the day doing some simple drywall installation in the bathroom.  Rick put the second layer on the south wall, and we discovered that the closet door wall only needed one layer.  We will have to do some creative work with the door molding, but in the end we will be happy with the results.

The closet wall is a funky wall because the original
wall was crooked.  The side needs only one
layer of tile while the top really could use two.
The west vanity wall is complete.  The hardest
part was cutting out holes for the electrical
and plumbing components.

We stayed around the house this morning waiting for Nathan from the flooring company to come at 9:30.  Nathan arrived and told us what we should get ground down and refinished before we add the tub and other fixtures back into the bathroom.
The floor next to the closet shows where the
original tile rounded the corner to the tub.
Although the tub will cover most of the line
left by the original edge, we will have it cleaned
a bit to blend with the rest of the floor.
The wall around the base of the room needs grinding to blend
the area since the original walls were thicker than the new walls
will be.

Once everything is complete and the dust is gone, they will come back an repolish the high traffic areas of the house.  He said that the floors were in really good condition, but we have a few spots that could use attention.  As with everything else, a little care and maintenance goes a long way in avoiding costly repairs. Nathan's estimate came in reasonably priced although redoing floors was not part of our original budget.

Once Nathan left, we headed out to the plumbers to pick up our estimate on the cast iron tub, the chrome drain, and the installation costs.  Granted, we knew that this estimate would blow the budget because we originally had planned on the afore-mentioned acrylic tub and surround that we finally rejected.  So our $800 budget for the tub bloomed into an approximately $1200 estimate. And that cost includes switching from a $100 Kohler drain to a $50 Gerber drain.  Since the bathtub only will be used a few times each year, I am sure that the drain will be fine.  Sigh.  No remodeling ever stays within budget, but we both feel that the cast iron tub and the solid surface walls will be more to our liking in the end.

We still have to choose the wall treatment.  Our two options right now are the Swanstone that we have in our shower in Wisconsin or a new Kohler solid surface product called Choreograph.  We know that the Swanstone works well, cleans easily, and is fairly easy to install.  We both have to research the Kohler product yet.  They seem to be almost identical in price, so our decision will come down to quality, availability, and ease of installation.

Our final remodeling stop was our seemingly-daily-trip to Home Depot.  When I was contemplating the ways of the world at 2:30 this morning while trying to fall asleep, I accepted Rick's argument that the Kohler sink we purchased was too large for our vanity.  The sink itself will fit nicely, but the base of the faucet spigot and handles are larger than we expected, and I completely forgot about space being taken up with a backsplash.  By the time we add all of that to the perimeter of the sink, the granite people will run out of space to cut holes!  And since the sink is an under-mount sink, they need room to attach it to the granite countertop.  So back we went to Home Depot to return the sink.  We will order the same sink, but in its slightly smaller size so the poor granite people will have room to work.

A quick stop for groceries brought us back home so I could do some Friday cleaning (and DUSTING!) to somewhat get this house back to a habitable abode.

The floors, tub, and tub surround all will cost us more money than we had anticipated, but in the end we will have a main bathroom that will match the style and era of the rest of the house, and Gladys will be whole again.


Thursday, October 27, 2016

Day 9: Bathroom Remodel

With the demolition completed, we have moved into the installation phase of our project.  I have to mention how relieved I felt not having to wear a mask and ear protection today.  I could actually breathe and hear Rick when he said something to me!

Rick called the city, and they came to remove the dumpster from our driveway.  If anyone wants to know, our bathroom fit into 4 cubic yards of dumpster space!

The wall before we added mirror supports
and relocated the light box.

A good part of the morning was spent doing the "behind the scenes" work of adding furring strips to shim out the west wall.  The strips were necessary to give room for some wires that could not be fished through the studs.  We also had to measure, measure, measure where the height of the vanity would be so we could determine where the mirror would hang.  All of that was necessary to figure out where to locate the box for the new light fixture.  I am happy that with the soffit gone, the light can now hang on the wall above the mirror rather than hanging down over it like some napping bats.

We had to add extra wood to the studs so we would have a surface onto which we could hang the mirror, and we needed to add support wood for the light box since where we wanted to locate the light was in the middle of thin air between two studs.

The first layer of drywall covers the wall next
to the doorway.

Rick was antsy to get up that first piece of drywall, but before he did the west wall, we had to take care of the north wall with the door in it.  Since we removed about an inch and a half of plaster, we have door jambs that will stick out if we just replace the removed material with 1/2 inch drywall.  Rather than buying expensive shims for that wall, Rick determined that adding two layers of drywall to that wall will be much less expensive.  He added the first layer today and will add the second tomorrow.

All of that calculating, shimming, and scabbing in additional structural wood took time.  We finally were able to bring in the first big sheet of drywall for the west wall.  Rick had gone out earlier to get drywall carriers.  I can  handle a full sheet of drywall as long as I have something to help me lift it and hold onto it.  Without those carriers, this would be a very long reconstruction process!

Rick adds screws to hold up the first large sheet of drywall.

We hoisted the first sheet of drywall up and into place.  Rick secured it with a few screws so it did not come tumbling back down off the wall.  He had cut the hole for the light electrical box perfectly, but once the drywall was up, we discovered that the box stuck out too far.  Rick had measured the depth of that box at least three times.  The math made sense, but the result was not acceptable.  Down came the first large sheet of drywall so he could make further electrical box adjustments.  Thankfully, those adjustments were fairly easy, and we soon had the drywall back up where it belonged.

An e-mail from Home Depot told us that our Sterling tub and tub surround had arrived and were ready for pick-up.  We ordered the Stirling because it was acrylic and easy to handle.  We had seen the whole system at the Kohler showroom in Wisconsin, and we liked how it all went together.  The system we purchased is the first caulkless tub/ tub surround system.  We were a little concerned because online reviews said that the systems were susceptible to damage in shipment.  Off we went to Home Depot, resolved to check for damages before we brought the system home.

Our fears were confirmed at Home Depot when we opened the tub box.  The "lip" of the tub on both ends was broken, two huge scratches snaked across the inside back, and a quarter-sized dimple on the outer front rim suggested that someone had set something heavy and half-mooned shaped on top of the crate.  The worker at Home Depot apologized for the damages even though it was not his fault.  We refused the whole shipment.

In my mind, I could hear my grandfather Will say, "If you buy something cheap, you get something cheap."  He was right.  On the way home from Home Depot, we stopped at the local plumber and asked for a bid on a cast-iron Kohler tub and its installation.  We are done with acrylic, and neither of us regrets the decision. The Stirling system just looked cheap, and we both would have been paranoid for the rest of our life about chipping or cracking it. Will the cast iron tub cost us more?  Sure.  But we do not have to worry about bringing it in or about installing it.  The 54-year-old drain is scary looking, so I am glad that Rick will not have to try to figure out how to plumb the tub to it.

The local plumber has not called with his bid yet.  That will probably be a heart-stopper, but we have decided that this is the right path for us.  Discussions continue as to what we will do for a tub surround.  We need to see what is available and what we can afford.

We have tried to put in the best that we can afford so that our work will last us the rest of our lives.  Gladys may be old, but she is going to be a first-class dame when we get done with her.


Wednesday, October 26, 2016

Day 8: Bathroom Remodel

Picture two very large, angry, vociferous grizzly bears having a domestic dispute outside a huge sawmill that is chipping hardwoods as a monstrous thunderstorm loudly rumbles across the landscape.  That is what I awoke to at 3:22 a.m.  When he is tired, Rick snores.  He was very tired this morning.  I gave up, shut the bedroom door behind me, and moved to the couch in the living room.  I still could hear him snore.

I finally fell asleep sometime between 4:20 and 5:00, only to be awakened by Rick bounding out of bed -- after a good night's sleep, I presume -- to start yet another day.  He actually did not start with the remodel since today was his day to get allergy shots.  He left by 7:30 and stopped at his favorite store, Home Depot, before coming back home.

Rick called Finish Line Floors to see if we could get a bid on how much polishing the floor in the bathroom would cost.  We need to "erase" some of the lines where the old walls and the bathtub once stood.  We received a call back, and someone will come out tomorrow or Friday to look at what we want done.

Since Rick cannot do any heavy physical activity for a few hours after his shots, we decided to visit some granite dealers to see what might be available for our vanity top.  Not-so-great experience with the granite in our kitchen made us take a sample of the kitchen countertop with us so we could somewhat find something that would go well with the terrazzo floor.

Our first stop was at A+ Design Center where we had gotten a countertop for our laundry sink a couple of years ago.  They just moved into their new facility two weeks ago, so their showroom was in the process of still getting set up and their inventory of slabs was only half there.  We did have a very young, energetic sales woman who seemed to be part of the family that owns the business, so she showed us some remnants since we certainly do not need a full slab to do a small bathroom vanity.
The slab of granite that we chose for the vanity has some of
the same colors as the granite in the kitchen, yet it is
unique.

We actually found a piece that both of us liked, and by comparing it to the kitchen sample, we think that it will blend well with the terrazzo floor.  We ordered the slab with the idea that having someone come out to measure the exact dimensions would have to wait until we had drywall up and the vanity back into the actual room.  We also did not have the sink yet, although that did come in this afternoon.

Once we ordered the vanity top and backsplash, we discussed getting a small piece of quartz for the windowsill.  They actually have samples that almost are identical to the sill that we had to remove, so we found a piece of that which we can use, too.
Another view of the granite choice.

What a relief!  I hate picking out granite, but we found what we were looking for at our first stop, and we found what will work for the windowsill, also.  Progress is wonderful!

We had a quick lunch at Arby's and then returned home to start our work for the day.  Rick took the grinder and cut around the window to remove the excess plaster and to bring the window down to what will be the finished depth of the wall.

Then he cut around the top of the room to have a clean finish between the walls and the ceiling.  Doing that will make cutting and placing drywall tomorrow much easier.
With the sill chipped away, we have a flat surface on which to add
the new quartz sill.

His final job was to remove the old windowsill so we can rebuild a surface on which to add  the new quarts sill when it is cut to size. We are excited to have the sill replaced with material that will match the existing sills in the house.

Tonight, after dinner, we will once again travel to Home Depot because we got emails today that the sink, sink faucet, shower valve, toilet paper holder, and towel bars are all in and ready for pick up.

The bathroom is coming together, and we are still hanging in there with the budget. The demolition part of the project is complete.  Now we can start to rebuild the space into the modern bathroom Gladys deserves.

If I can just keep the bears out of the bedroom, all will go well tonight.


Tuesday, October 25, 2016

Day 7: End of Week 1 for Bathroom Remodel

We completed more than we thought we were going to finish today, so in that respect this has been a good day.

Once again we were up before the sun and putting on face masks by the time the sun was creeping over the horizon.  We agreed yesterday that our first task was to remove the toilet.  We wanted to make sure that we got the toilet out without damaging it or the plumbing.  Well, one out of two isn't so bad...

Rick is a pro at taking out and putting in toilets.  I can count at least a half a dozen times that he has done so, and other than it not being in the top ten things he likes to do, once again he removed the toilet with no problem.  I now am the only woman on the block to be sitting in the Florida room with a vanity to my left and a toilet right behind me.  I call the look Early 21-Century Remodel.
The second layer of drywall evens out the ceiling
where the soffit used to hang.

Once the toilet was safely out of the way, Rick cut the second sheet of drywall to patch the ceiling.  That, too, went up with little trouble.  Working overhead is still difficult for him, and the worst part of the job (taping and mudding the joint) is yet to come, but for now the ceiling is up and the room looks much bigger and better without that mid-20th-century soffit.

So far, so good.  Two jobs completed.  The next task was to take down the remaining tile in the corner where the toilet once stood.  The west wall behind the toilet came down with only one problem: bloodshed.

Experience has taught me that when I pack a bathroom for remodeling to always keep out bathing essentials, extra toilet paper and tissues, and the first aid kit.  Other than a collision yesterday between a hammer and Rick's thumb (a sure sign we had worked too long and it was time to quit), this remodel has been fairly safe and accident free.  However, today I picked up the handle on a bucket of debris, and as I brought my hand up, my middle finger just brushed against a sharp tile shard.  I quickly bled through the first bandage, so I just slapped another one on top.  The tile was fighting back, and I lost that round.
I learned the hard way that tile is sharp!

Little did I know that my cut finger was just the tile's opening salvo.  With the west wall down, Rick tackled the tile under the window.  Rather than cutting it into smaller pieces, Mr. Impatient put the large crowbar behind the wall and pulled.  The entire thing came loose!  He yelled for me to put down a 2 x 6 piece of lumber to protect the exposed plumbing, and just as I got it into place, the wall came tumbling down.  Sadly, the lumber was not strong enough to protect the plumbing, so when the tile wall fell, it cracked a connecting joint in the pipe that provides water to the toilet.  The tile was fighting back, and we lost round two also.

Thankfully, being the experienced remodelers that we are, we actually had all of the necessary tools and materials to fix the cracked joint.  I am so glad that Rick knows how to do all of this type of work because calling a plumber right now was not part of today's plan.  While he was in the plumbing mode, Rick also replaced the compression fittings on the sink pipe with new soldered fittings.  Plumbing was not part of the game plan, but completing this today takes it off the list for later.
Note to would-be remodelers: always take pictures of exposed
plumbing and electrical wires for future reference when the
walls hide those essential components.  The new joint and
shut off valve are soldered into place.

Yesterday we went to Publix for some groceries, and we found a Publix make-your-own-personal-pizza kit in the deli section.  It came with four crusts, sauce, and cheese.  We purchased some turkey pepperoni and tried two for lunch today.  They were delicious-- far better than the "cardboard" frozen personal pizzas that Rick used to eat.  And we could not beat the time (9 minutes in the oven) nor the price: $1.50 each.  We still have two crusts, sauce, and cheese left, so I suspect pizza for lunch tomorrow also.  I am sure that we will purchase them for future lunches.

After lunch, Rick said, "Well, we are done with the dumpster.  Maybe I will call them and tell them to take it away."  I told him not yet because we were not finished with all the demo, and we might find drywall fragments and other debris that we wanted to get rid of.

Am I glad that we kept the dumpster because Rick's next thought was, "Let's take out the tub."  He began to try to dismantle the drain mechanism which was no simple task since the drain was the original one from 1960.  It was rusted into place, and he had to practically cut it out to remove it.  Once the drain was free, he took a crow bar and pried up the tub.  We placed it on end on a furniture dolly and wheeled it to the front door.  Then we manhandled it to the dumpster, balanced it on the edge, and dumped it in.  Hooray!  It fit, and I was actually strong enough to lift it!

The pink tub fit nicely into the dumpster.

I went back into the house and started to sweep up the debris that was under the tub.  I really had feared that the tub was simply nestled in a bed of tar which was poured onto the dirt under the house. I was relieved because what I saw I thought was a cement foundation with just a foot-square hole cut into it for the plumbing. Then I looked closer and saw a faint, familiar pattern in the "cement."  I was astonished.

"Rick," I said, "You have to come and see this."

"What?" he answered as he came into the bathroom.

I took my gloved hand and rubbed at a section of the cement under the tub. A pattern appeared. "It's terrazzo," I said.
The washed area (upper part of the picture) reveals
the terrazzo look that is under all of the dust and debris.
A small patch of tar was all that held the tub in place.

I got a bucket of water, and sure enough.  The bathroom terrazzo floor went all the way under the tub.  I had been worried about what we were going to do if the new tub did not cover the same area of floor as the old tub.  I was afraid that the terrazzo would end and that we would have a gap to fill.  I need not have worried.  Now we just have to figure out how to polish the edges of the room and the lip of the floor that was in front of the old tub.  Maybe we will have to get the floor refinishers back in to polish the whole floor for us.

The final task of the day was to get rid of the old Home Depot laminate countertop that we have used for the past six years.  We were going to take out the Habitat for Humanity Restore $10.00 pink sink and take it back to the Restore for them to sell again, but Rick chipped the sink as he was trying to remove it from the countertop, so both the pink sink and the countertop joined the bathtub in the dumpster.  See, I said that we were not finished with it yet.

So, toilet out, ceiling up, wall down, plumbing fixed, tub out, and countertop and sink gone. And all of this was completed before 2:00 p.m.  This has, indeed, been a good day.

Monday, October 24, 2016

Day 6: Bathroom Remodel

Today started early, but that allowed us to finish what we wanted to accomplish early also.  Life is choices, and there is always a trade off.  This is the first time since we started the remodeling journey that we actually have everything cleaned up for the day before 2:00 p.m.

The goal today was to get down all of the pink and white tile so we could fill this first dumpster and get a new one to continue our work. Rick had removed the tile at the head of the bathtub and half of the back wall.  Today he started by removing the rest of the back wall tile.  Had this just been drywall, the task would have been completed days ago.  However, this tile is still embedded in an inch-thick bed of plaster which is connected to wire mesh that is strong enough to stop a Sherman tank.  As he pulled down the chunks of wall, I was running them out to the dumpster in the driveway. (I have three new cuts and a nice bruise to prove it!)

The tile around the tub is now in the dumpster.
Success!
As soon as the back wall was down, Rick moved on to the foot end of the tub which is on the south outside wall of the house.  This was a bit more challenging because we were trying to preserve the frame around the window and the tiled windowsill.  Rick carefully cut the tile next to the window with his grinder, but our efforts were in vain.  As he pried the other tile away from the wall, the window sill cracked.  The sill is all tied into the wall structure with that same wire mesh, and one was not about to come off without the other.
Our tiled windowsill in the bathroom soon will be a thing of the past.

We are now resigned to finding something to replace the tile windowsill. In reality, the existing sill probably would not have worked anyway because the tile/plaster/wire combination is over an inch and a half wide.  Once it is all down, we will replace it with 1/2 inch drywall, so the sill would have hung over the new drywall anyway.  Modern building materials and 54-year-old houses don't always dance to the same tune.  I guess the good news is that when all of the walls are back to the studs, the new drywall will give me a wider and longer bathroom when we complete it.

This is a side-view of the mess we have to remove
from the lower walls.

The original plan was to take out the toilet so we could remove the remaining pink and white tile; however, as the fatigue set in, Rick decided to remove the upper walls instead.  The upper part was much easier to remove because that is just drywall with an ugly skim-coat of "texture" that was popular in 1960.  Thankfully, the upper walls did not have any wire mesh.

We want to leave the ceiling as undisturbed as possible, so Rick took the grinder and cut the wall about an inch from the ceiling.  By doing so, he was able to remove the drywall without cracking or ruining the ceiling.  We have a little "clean-up" work to do, but for the most part, the upper walls are down.

The dumpster was even more full after we added
the drywall from the top of the walls. We were
afraid it would be too heavy to move if we added more.

Rick took a break and called the City to request that they haul away the first dumpster and bring us a replacement. He called at about 11:00 this morning, and they promised him that we would have a new dumpster sometime this afternoon.  In less than a half-hour, we heard the back-up "beep-beep" of a City truck and looked out the window as the truck pulled up to replace the dumpster.  The City Waste Management crew is the only organization I know that promises something at one time and actually delivers said products early!

The new, empty dumpster is better place in the driveway.
With the new dumpster located a little further back in our driveway, we returned to working on the bathroom.  We decided to patch the ceiling where the soffit had been since we both were sick of insulation snowing down on us even though we had the opening covered with plastic.  Because the ceiling also is thick, we have to replace an inch of space.  Rather than shimming out the drywall, we decided to just put up two layers of 1/2 drywall.  The double layer will help insulate the room from the heat of the attic, and adding two layers is easier than putzing around with shims everywhere ... or so we thought.

The original ceiling seems to "slope" a bit since it is higher
on the south than on the north end of the room.

As we installed the first layer of drywall, we noticed that the ceiling is not quite level.  We still need to put up the second layer of drywall -- in places -- to fill in the gap, but the "gap" seems to increase or decrease in depth as one looks across the room.  The ceiling may call for some creative taping and mudding in the end! (Rick just said that with the new light fixture we ordered, we just will blind everyone with 500 watts of light and no one will notice the ceiling.  Worth considering...)

Only a small section of old tile remains. This is where we will
start tomorrow.

By the time all of that was completed, we were approaching noon.  Rick originally talked about taking the toilet out so we could take down the rest of the tile after lunch, but resting for a few moments revealed just how tired he was.  We decided to wait until tomorrow and to remove the toilet when our minds and bodies are fresh.  (Note that I did not say, "energized"!) I like my sister-in-law Chris' philosophy that if one works at a steady pace and does just a little bit each day, eventually the task will be completed.  Sadly, her husband and mine do not always know when to quit.

I am pleased with the progress today.  We have a new dumpster that we can use to finish the job.  The City's new rules are that one can only have a dumpster for two weeks instead of unlimited time, so this dumpster will allow us plenty of time to finish the project.

We have only been back to Gladys for two weeks as of today.  I would say that we have accomplished quite a bit in that time.


Sunday, October 23, 2016

Day 5: Bathroom Remodel

Today was supposed to be a day of rest, but as you can see by the title of this blog session, it turned into the fifth day of remodeling.

We started the day with a trip to Home Depot before church to pick up more electrical wire and supplies.  Rick discovered yesterday that the one ground fault (GFCI) receptacle we had in the bathroom was not working right, so part of the purchase today was a three-pack of GFCI receptacles.  Why three?  The three-pack was less expensive than just buying two single ones, so now we have one to spare if another one fails.

After church, we hung around a bit for Pastor Appreciation Day.  We like our new young pastor at church, so we helped him celebrate his day with his favorite dessert: pie!  I had a piece of cherry/rhubarb pie while Rick tried the raspberry pie.  I think I saw Pastor try two or three different pieces.  He REALLY does love pie.

When we got home, we had a quick lunch, and then Rick changed into work clothes.  Because we did not finish installing the additional receptacle in the bathroom yesterday, the power was out all night for our bedside lamps and my clock.  Rick also discovered that in addition to the master bedroom, the guest bedroom also was connected to that same bathroom circuit, so none of the receptacles worked in that room either.  Ah, the wonders of an old house!

New yellow wire snakes through the walls to power both the bedroom receptacle
and the two GFCI receptacles in the bathroom. 

After running wires and working for almost four hours, we now have a re-wired receptacle in our master bedroom, a replaced GFCI receptacle near the bathroom door, and a new GFCI receptacle in the main bathroom ready to power Rick's razor and the electric toothbrush.  Naturally, more of the attic insulation snowed down on his head, so clean-up was the usual pain.

While he was busy doing all of that, I was cleaning our much-neglected only functioning bathroom.  I also watered the palm trees (a daily chore) and the vegetation around the house, and then baked some biscuits for dinner tonight.  As soon as Rick completes his second shower of the day, I will put in our daily load of laundry.

Tomorrow we both will be back in the bathroom once again ripping down walls.  Our goal is to get all of the walls down by the end of the week so we can start the rebuilding process.  We had to take advantage of the open walls now to update the electrical and to add the services (fans, lights, and receptacles) that we wanted.  Tomorrow we will continue with the wall work.

This bathroom is taking longer than Rick expected -- but then, he always underestimates how long a job will take to complete.  It also is costing us more money than we anticipated; however, we went into this remodel with enough experience to know that ALL remodeling chores go over budget.  The added expenses are annoying but not totally unanticipated.

This is the last room we have to remodel in Gladys.  Then she will be finished, and I hope that we can start to relax and enjoy our retirement... until the next project pops up!

Saturday, October 22, 2016

Day 4: Bathroom Remodel

 Today was one of those days that sounded simple in concept, but was not so simple in execution.  Today was our day to "take it easy" by completing all of the electrical work: putting up a vented ceiling fan with a light, rewiring the electrical switch box to accept the switches for the new fan and light, providing service for our new room light, and adding a second receptacle box for two more plugs.  Simple, right?  The electrical work took a full eight hours, and we still are not quite finished.

The day actually started with a trip to Home Depot to pick up wire and a few other supplies.  Then we made a side trip to Habitat for Humanity's Restore to drop off the bathroom fan that we had purchased four years ago with the idea that we would someday put it into the main bathroom.  That plan changed when we discovered that the fan would not fit in the limited rafter space.  We also learned that we like the fan we installed a couple of years ago in the master bathroom because it has a fan that turns off on a timer, so we can shower and go in the morning and not have to worry if the fan ran long enough to vent the moisture from the room.  So... Habitat for Humanity's Restore got a brand-new four-year-old fan to resell.  Actually, when we were in the store a woman was in there shopping for bathroom supplies--including a vented fan!  I suspect that the Restore priced and sold the fan within hours of our dropping it off.

When we returned, Rick started working on our new vented, lighted fan.  Thank heavens he knows electrical circuitry because most of the time I had no clue what he was doing.  Once we located where we wanted to hang the fan inside, we went outside to the soffit to cut a hole for the exhaust vent.  Sadly, where we wanted to locate the vent did not work out.  Rick used a jigsaw to cut the hole, only to discover that it was a hole to nowhere since it had beams and cross-beams totally enclosing it.  There was no way that we could feed ductwork to that opening.  Oops!
The "oops" location (left) and the final location of the outside
vent for the fan.  Patching the "oops" will happen later.

We had to move the hole to vent the fan closer to the window than we wanted, but that was the only location that allowed us to snake the ductwork over beams to the soffit.  It is not ideal, but it will do.  I am thrilled that we will have a working, vented fan in both bathrooms.  And as for the "oops" hole? A little Bondo and sanding, and no one will ever know it was there!

Probably the most frustrating part of the day was trying to get the flexible ductwork over the end of the outside vent.  The expandable ductwork kept unraveling as the sharp edges threatened to cut Rick's fingers to shreds.  Finally, he was able to get the ductwork in place and securely fastened into place.

Three days after closing on Gladys six years ago, we had much of the electrical work updated.  At that time, the electricians put a junction box up in the attic for a "someday" bathroom fan, and they ran the wire back to the main electrical box.  It has rested there, undisturbed, until today. We were very, very glad that this pre-planning allowed us to complete what we did today.

The new fan also will provide light in the tub
since it is located just outside the tub area.
The fan is located near the toilet so it can help
to eliminate unwanted fragrances also!

Fishing wires back and forth from the switch box up to the fan is not fun, especially when we had our blown-in insulation falling on our heads like a mid-winter snowstorm.  I did say, however, that I was thankful what fell was the new, white insulation that we had blown into the attic a few years ago after we had had the gross, brown, smelly old insulation removed.  That was the second time today that we were glad we had a little foresight years ago to make today's task easier.

Fishing new electrical lines to the switch took
some time, but it was worth it in the end.

The weather cooperated today also.  Being in the attic is no fun, but our temperatures today only got into the mid-70s, so opening up access and being in the attic was tolerable.  I would not have wanted to do this job on a 90+ degree day.

Setting up a two gang box to accept the two switches for the fan and light and a main switch for the main bathroom light took a little time.  We had to take out old wires, run new wires, and try to get everything to fit in the right cavities in the walls.

In the process, we came across three thick wires that used to provide the "juice" to run Gladys' original ceiling heating system.  We were almost positive that the wires were all dead and disconnected from the breaker box, but Rick tested them one last time before he cut them down. He is not dead, so the wires must have been so.

Our temporary light is not pretty, but it will serve its purpose.

When we took the soffit down a couple of days ago, we also eliminated the only lights to the bathroom.  Until we can figure out the logistics of our vanity, the new vanity top (which we have not yet chosen), the sink and faucet, the location of the mirror, and finally the dimensions of the lights we just ordered, we cannot set up the permanent electrical box for the main light.  So for now, Rick just put up a temporary light.  By doing so, we know the switch works, and we can have light if we need it.

Thankfully, once Rick was done with the always-scary job of connecting the new electrical components to a new breaker in the electrical panel, we were relieved to learn that everything worked just fine.  The correct switches turned on the correct lights or fans, the new receptacle was live and provided power, and nothing popped or burned in the process!

We still have to add the wires for a second receptacle box.  We have the materials, but we ran out of both time and energy today to complete that part of the plan.

Today took much longer and was more difficult than we had imagined.  Figuring out what wires had to go where, painstakingly wiring everything correctly, and doing much of the work overhead, left Rick exhausted.  We are happy with the results, but this job again goes into the category of never wanting to do this again.

Tomorrow is Sunday.  I plan to sleep late, go to church, have a relaxing lunch, and spending the day as it was originally intended to be: a day of rest.

Friday, October 21, 2016

Day 3: Bathroom Remodel

As the title suggests, today was the third day of our labor to remodel the bathroom.  And as is true for those of us who did little physical labor this summer, Day 3 brought on weariness with the force of a Mack truck going 90 miles an hour.  One moment we both felt pretty good, and then BAM, the energy was gone.

Having done several of these projects before, we know that this is the turning point and that each day we will be a bit less weary.  Our bodies just have to get used to expending energy and moving in ways that we have not done for a while.  Rick has a badly bruised ankle from a run-in with a crowbar and a new scratch across his torso from who knows what, but so far we have had no signs of blood.  I will take that as a good omen.

Since tomorrow a "cold front" is supposed to come through which should drop our temperatures down to the high 70s/ low 80s, ( yes, my Wisconsin friends, I know, I know...), we decided to get as much of the walls down today as we could so we could work in the attic with the electricity and fan tomorrow while it is "cool" out. Anyway, that was the plan.
The "before" picture which shows the walls we worked
to remove today.

Rick decided to tackle the tile around the bathtub.  His goal was to get as much of the tile into the dumpster as possible so the city could pick it up today and bring us a new one for the weekend.  He started his effort with the small wall next to the closet door where the tile wraps around the corner into the tile that surrounds the tub.  He immediately hit three inches of tile, plaster, and wire, all backed by triple studs around the closet door! To make matters worse, we think that this same plaster and wire configuration is under the upper part of the wall also.  Fun.


With much effort, that wall came down, and I hauled it to the dumpster. Then Rick moved on to the wall with the plumbing.  Once again, lots of structure behind the wall gave the builders plenty of surface on which to staple the wire.  Crowbars, small sledge hammers, and lots of pounding slowly surrendered the walls.  Rick was trying to be careful around the bath fixtures, but they were hanging on to the plaster with all of their might.

At last the plumbing was free from the wall, and Rick turned his attention to the back wall.  He had cut out and removed a large section of the wall.  He gave me a big piece to lay aside until he could help me carry it out to the dumpster.  When I went to place it in the corner, I discovered another nasty surprise.

Remember yesterday when I wrote, "Water has always been the enemy of any structure, and Gladys is no exception. " Ah, yes.  I still believe it today.  As I went to set the tile section down, I noticed that the rosin paper on the floor was soaking wet.  I looked down and discovered a puddle at the door, a flooded closet, and a silent, sneaky stream carefully making its way down the floor next to the tub.  I said the words my husband hates to hear: "Rick, we have a problem."

It turns out that the 56-year-old plumbing did not care for his rough treatment around the hot and cold faucets, so both of them decided to spring a not-so-slow leak.  We did not notice it at first because as the water slid down the copper pipes and decided to puddle under the tub.  When the cavity under the tub sufficiently filled to the depth of about two inches, the water overflowed into the closet and bathroom, through the wall under his desk in the guest room, and under the plastic door into the hallway.  What a mess! 
The open wall shows the newly capped pipes that
leaked under the tub and partially across two rooms.

We used every garage towel we owned to mop up the water.  The bathroom was a particular mess because the water was mixed in with plaster dust which turned to a muddy sand.  We lined the hallway with drop cloths, so they, too, were soggy at the door. 

Needless to say, we drastically altered our plans for the day.  Of course, we searched our "plumbing" box and could not find the caps that we needed to cut and to cap off the leaking pipes.  Rick shut off the water to the house.  While he went to the store to buy plumbing supplies, I switched into clean-up mode to take debris to the dumpster, to remove and bag all the soggy rosin paper, and to mop up the puddles throughout the house.  I actually did not discover the flood in the den until I went in there for scissors to cut the old rosin paper.  I hate water!
Naturally, the access to get under the tub is tucked away
tightly in the small bathroom closet.

We certainly did not make the progress with the walls that we had hoped to make today, but I guess that is OK, too.  We both are weary enough that the water crisis was just enough to make us both willing to quit for the day. What does Annie sing?  The sun will come up tomorrow.  We'll deal with the bathroom then.

Thursday, October 20, 2016

Day 2: Bathroom Remodel

We started work today by 7:15 (just as the sun was rising!) and we finished at 3:15.  I will admit, though, that we spent part of the day shopping both at Lowe's and Home Depot to get electrical and plumbing supplies as well as seven sheets of drywall.

Sadly, we had started work, so we were both dusty and dirty when we had to break for supplies.  With a work scarf on my head and plaster dust on my shoulders, I am sure that I presented quite a sight at the store.  Thankfully, we could hang around all the aisles with the contractors, so they looked just as bad as we did!
We removed the upper part of the wall and all
of the lower tile except for the area behind the toilet.

Our main focus today was to finish the lower part of the wall we started yesterday and to remove the north wall that contains the hallway door.  By doing so, we would expose the wiring for the switch and for the lights.  Rick also wanted to get the soffit removed, and we were able to accomplish all of that today.

We have learned that if we can get a long crowbar behind the layer of tile/ plaster/ wire mesh, we can pry off fairly large chunks at a time.  We were able to do that this morning, so the lower part of the vanity wall was down much more quickly than we had expected.  While Rick did most of the prying and muscle work, I did a lot of hauling large chunks and buckets of debris to the dumpster.  We have the dumpster about half full now.

The upper, rough-plastered walls are fairly easy to remove since they have a drywall backing instead of a plaster and wire backing.  When Rick was completing the upper part of the wall that he started yesterday, though, he came upon a nasty surprise.  Water has always been the enemy of any structure, and Gladys is no exception.  We know that at one point she had a tile roof which eventually leaked.  While the roof was changed almost 15 years ago, the damage from the leak remained in the wall above the toilet.  What we found was not water stains, but rather black mold.
Black mold coats the corner drywall above the toilet
as a result of a leaky roof over a decade ago.

Since my immune system is still compromised, Rick would not let me get near the mold or help him remove it.  Thank God for the Internet which gave us some good ideas on how to rid a house of black mold.  One of the things we purchased at the store was a commercial product to spray on surfaces that contain black mold.  Rick started by removing the moldy surfaces and then spraying what was left with the chemicals to kill and seal the area from further mold growth.  He also sprayed all of the wood that he could not remove.  We were fortunate that the moldy area was fairly small (probably 16 x 30 inches) and that we were able to stop the mold before it spread further.  Thankfully, new drywall will solve lots of problems!
Rick exposed all of the electrical connections
on the north wall next to the door.

The drywalled upper walls also made getting to the electrical connections on the north side of the room not difficult at all.  Since the tiled lower wall was fairly narrow, we also were able to remove it in a couple of large chunks.  Thankfully, the wall right next to the door jambs came out in large pieces, so we did not have to get near the jambs with any prying tools. Whew!  That was a relief!

As he suspected, Rick found that most of the wires were dry and needed replacing, so he started to pull out the old wires.  We will replace the whole system with new 14/2 grounded wire so we know we are secure.  Once that wall was exposed, Rick moved on to the soffit.
Rick works on removing the structure that supported the soffit
above the vanity.

Naturally, the blown-in insulation that we had put into the attic a few years ago made a wonderful mess.  I currently have three full bags of insulation that Rick scooped out of the hole he cut into the front of the soffit.

 I often wonder why the builders of the 60s were so enamored with soffits.  While they do provide a convenient place to hide ductwork and electrical wires, they also waste a lot of room and make a space look and feel smaller.  We had removed a soffit in Gladys' kitchen a few years ago and found no duct work and only a couple of small electrical wires in the whole thing.  I gained lots of cupboard space by using that area for taller kitchen cabinets.
We used 6 mil plastic stapled to the rafters to
temporarily seal off the attic and to hold the insulation
in place.

The same wasted space was evident as we began to remove the bathroom soffit today.  The cavity was hollow since the ductwork already was above the rafters in the attic, and the only things inside the soffit in addition to lots of insulation were the wires for the  two 1960's "tulip" lights which hung over the vanity.

Since the soffits were overhead work, they were a pain to remove, but by mid-afternoon, they were all in the dumpster. The tulip lights followed in short order.  The result is a room that is visually taller and seemingly more spacious.

We are happy with the progress we have made thus far.  Tomorrow Rick will replace all of the wires and will temporarily set up a small light so we can see what we are doing as we continue to remodel the last room in Gladys.