Big changes occurred both outside and indoors in the last two days. As we get closer to adding the "finishing touches" to our landscape and to our new room, the changes get more noticeable.
Travis, our landscape and snow removal contractor, said that he would bring a crew and come to our house on Friday to till the back yard and to bring in some topsoil into which he would plant grass. Our back yard, then, finally would be level, smooth, and spacious as we regain its use as a back yard. However, rain was predicted for Friday, so Travis arrived on Thursday with a trailer full of black dirt and a truck full of seed and equipment.
 |
Our unlevel yard full of trees is replaced with a smooth, seeded yard
that we hopefully will be able to enjoy next year. |
He thought we might need four yards of dirt to fill in the back yard, but in reality, he needed six yards to fill the back and side yards. Even now, we can see areas where we probably could have used even more dirt. Travis and his worker smoothed out the yard, pulverized the topsoil into even smaller pieces, and planted over $400 worth of grass seed. He provided temporary extended drain pipes from our rain gutters in the event that Friday's promised rains turned into torrential downpours. He wanted to make sure that the new grass seed was not washed away from the ends of the gutters.
 |
The extended gutters direct rain water away from
the seeds in the yard. |
In the front yard, he dug up the old black edging around my flower gardens and put in new edging. The tree guy who ruined our yard ran over a part of the old edging, absolutely burying it into the soil. Travis pulled it up, trenched around the garden, and added a new, heavy-duty edging. The last edging was probably 25 years old, and it was cut in two or three places, so we were not sorry to see it go. On Friday, as promised, the rains came in. We have had a good, gentle rain most of the day, so we were happy to see it come. The more it rains, the less I have to go outside to water!
 |
New edging outlines my front flower garden. Maybe next year
I will find time to update some of the bushes and perennials in
that garden. |
 |
Travis was only going to replace part of the edging,
but ultimately he replaced the section in front of the front door also. |
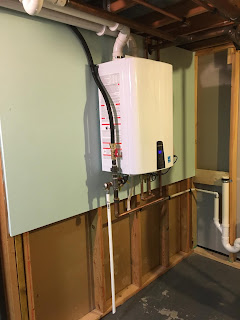
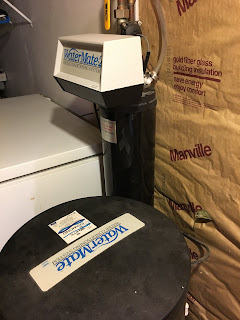
In my last blog I talked a little about disconnecting the washer and dryer to bring the drawer bases up to the new laundry room. On Thursday, Rick went back to the basement to reconnect the washer and dryer so I could use them until they are moved upstairs (hopefully on Monday afternoon). The dryer was easier to move than the washer since it weighed less, but connecting the dryer vent fought Rick all the way. He finally got it connected "good enough for five days," so I was content. The heavy washing machine was more difficult to move back into place and to level, but the reconnection was easy.
 |
Note how low the laundry units are in relationship
to the washer water hook-up in the wall. |
Then the test came: would they work? Thankfully, they did. I have completed two loads of laundry with no leaks and no dryer dust escaping into the room. I have learned to appreciate how much easier completing the laundry task is with the washer and dryer on their drawer bases. Getting almost onto my hands and knees to load and to transfer the laundry to the dryer is NOT fun. I am definitely too old to start doing that. I cannot wait until my laundry facilities are upstairs and up on their bases again.
We finished applying the last coats of varnish for the remaining cabinet pieces on Thursday, so today we could work with those pieces. Rick started by installing the kick plates on the west wall cabinets. I always am amazed at how those little details make such a difference.
 |
We used our modified jig to help lift the large
bookcase into place. |
Then he and I tackled the large bookcase that will hang over my laptop desk. The case was difficult to maneuver because it was awkward, heavy, and built to fit snugly between the other cabinets and the large pantry unit at the end of the wall. Rick had to modify his lifting jig, but after a bit of a struggle, the 46.5 inch bookcase was positioned just as we had envisioned it. Lots of screws now hold it in place. The good thing is that the bookshelf is so wide that we actually could use three studs in the wall to secure it into position. Again, there is Anderson building at its best.
 |
The "free-floating" desk frame is securely bolted
to the back wall and the cabinets on both sides. |
 |
The west wall now awaits the granite countertops,
drawers, base slide-outs, shelves, and cabinet doors. |
Next on the agenda was the desk frame. We mounted it lower than normal because 1) I am short, 2) it is supposed to be a laptop desk, not a normal height desk, and 3) it also has to serve as a sewing table. Both the laptop and the sewing machine are easier to use if they are not halfway to my chin, so we mounted the desk frame lower than normal. Once the granite is installed on top, it will gain another inch and a half, so it will come up the the correct height for my specifications.
 |
Free from an errant nail, the pocket door is framed
and functions well. |
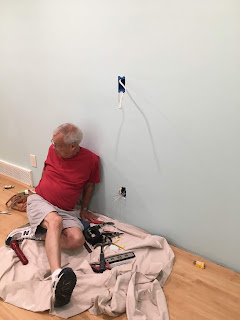
Once that was finished, Rick added the door molding for the pocket door. We actually added a second wall to accommodate the pocket door, so we had to redesign all of the molding to fit the new dimensions. Everything went well until he forgot to change out the length of the nails in the nail gun, thereby accidentally driving a small nail right into the pocket door. A bit of swearing did not seem to remedy the situation, so he had to cut the nail and remove the molding to get everything back our starting point. A third trip today to Home Depot now has us in possession of the correctly-sized nails to finish that job tomorrow.
We took a short break today to return to the shop that is building the cabinet doors. We took in a stained and varnished piece of our oak to learn if the finish we tentatively selected would actually work. It does not. We have decided to have the shop provide a custom mix of stain that will more closely match what we have already built and installed in the room. Sigh. As Rick and I too often have been saying, "It's only money!"
Our next task in this seemingly endless day was to install the crown molding. Note: one should never try to figure out how to cut crown molding at the END of a long, long day. Rick spent an hour getting the cuts correct, and then, sadly, when we had the crown molding up on the first wall, neither of us liked it. All I see is wood, wood, wood in that room, and the crown molding was just too much. We decided to take down the piece we have installed (tomorrow!), and to patch the holes. Instead of the heavy crown molding, we will try to find some smaller cabinet molding to top the upper cabinets.
Of course, the challenges of the day were not quite over. Rick took a final trip to the store while I prepared dinner, and came back to report that the tire light on the Lexus was blinking. We had one very low tire. The good news is that we have two compressors right now at our house, so filling the tire was not difficult. The bad news is that we do not know if the tire had gradually lost air and we were too busy to notice, or if we picked up a nail during one of our thousands of trips to Home Depot and Menards, and the tire will be flat again tomorrow. Time will tell...
As you can read, our days have been exhaustingly busy and eventful. We smile at what goes well and work together to figure out how to change or repair what goes wrong. We both are eager to get the room completed which is why we work so hard each day toward that goal.


