Saturday, August 18, 2018

Cabinets and Crooked Walls...and Ceilings...and Floors

Work started by 7:00 a.m. today, and we finished, sort of, by a little after 3:30.  In that time, we hung cabinets, installed base cabinets, built a face frame for the bookshelf, and prepped and stained the cabinets that will surround the washer and dryer on the south side of the room.

The first wall cabinet was a challenge because it needed to rest against the north wall, and the north wall in that room is anything but straight.  Also, the ceiling above where that cabinet hangs also has a few dimensional issues.  Rick had to do some creative planing to get the filler strip next to the wall to adjust to the way the wall was built.  In the end, he did a great job.  The cabinet is plumb, the filler strip conforms to the wall, and we hope that the crown molding will hide a multitude of sins regarding the ceiling.

With the first cabinet in place, Rick clamps the
face frames together to make sure they are plumb.

Our jig and jack that helped us lift the cabinets
to the proper height.

I am too weak to hold up heavy cabinets for too long, so Rick devised an ingenious way to get the cabinets where we needed them.  His invention started with a base scaffolding given to us by Stephanie's neighbor in Minnesota, topped with a cut-off piece of plywood.  We used a bottle jack which fit into an indentation in the bottom of a 2 x 4 structure which was topped with another cut-off piece of plywood that fit inside the bottom frame of a wall cabinet.  Once we got the cabinet up on the lifting structure, we simply had to balance it while we pumped up the jack, letting that do all of the heavy lifting.  Would this have been OSHA approved?  Hardly.  However, it worked for us and saved our backs.  Being able to adjust it up or down was fantastic, and we were able to get all of the upper cabinets in place without blood, backaches, or bruises.

Two down, one to go.

The second cabinet went up fairly well.  The third one took a bit of adjustment, but eventually, it, too, was plumb and secure.

The jack holds the third cabinet inlace while Rick
secures it to the wall.  Finding the studs was one of the
most difficult parts of hanging the cabinets!

With the laminate floor removed from the space,
we were ready to install the first base cabinet.

Once the uppers were hung, Rick cut out the floor so the base cabinets could rest on the subfloor.  Since the room has a floating laminate floor, we cannot put cabinets on top of it.  The floor must be allowed to expand and contract without moving the cabinets.  Thank God for Festool saws!  My hearing may never be the same after listening to the blade cut through laminate, but the result was a cut floor and room for base cabinets.

Another two down, one to go.

The base cabinets were a lot less taxing as far as weight was concerned, but the uneven walls did cause us to use quite a few shims to get everything level and plumb.  These base units will give us loads of storage space, and they will be easily accessible once we add pull-out shelves in them.

And then there were three!  The base cabinet
next to the wall is reserved for Owen's toys.

Once the cabinets were installed, we moved out to the garage to fill in pocket-screw holes, to sand the remaining cabinets, and to get them stained.  We finished all of that work a little after 3:30.

The face frame  of a set of bookshelves
balances above where my granite-topped
desk will be.
We both dreaded hanging the cabinets; however, in the end they were not as difficult as we thought they would be.  Yes, they took some adjusting, but if you have ever built anything with any Anderson in this family, then you know that they are built to last.  Nothing will make them come off the wall, and the base units are not about to fall apart or to budge either.  Rick's grandfather always said, "If two screws are good, then three are better."  I now have a room full of cabinets, and they are going to be here for a very, very long time.


t

Friday, August 17, 2018

Plumbing and Plumb Cabinets

The last two days have brought about a tremendous change in our remodeling.

When we had visited the plumber a couple of weeks ago, he said that he would "try to fit you in on either Thursday or Friday" of this week.  For that reason, we took Wednesday afternoon off to drive to Wisconsin Rapids to visit my mother.  We have not seen her in weeks, and although we know she understands that we are busy, we still needed to make that visit.  She is 95 years old, so she deserves some of our time and attention, too.

Yesterday (Thursday) morning dawned, and I told Rick that I wanted to call the plumber.  He was hesitant to do so, but he finally agreed.  When I called, I simply said that Jason had mentioned trying to get to our house on Thursday or Friday, and that we were wondering if that was still in his plans.  We needed to get the laundry room plumbing roughed in so we could add drywall and install the cabinets before the countertop people come out to measure for the granite countertops.  The woman who answered my call said she would talk to Jason and get back to me.  About a half hour later, she called and asked if the plumbers could come out that day.  Of course, I agreed.  Rick and I were planning on installing the large cabinet in the room, but we knew that our job could wait.

Dennis and Neil came to our house and worked at least five hours.  They roughed in the plumbing for the washer and installed a vent pipe up through the roof.  We are SO glad that Neil rather than Rick was the one to go up into our hot attic for that job.  Our only chore was digging out some leftover shingles that we had stored in the shed so Neil could repair the roof where he cut the vent opening.  He did a fantastic job.

Plumbing lines lead to the new supply box
while the vent pipe travels up through the roof.

Dennis and Neil also rebuilt our soil stack in the basement and prepped that for the new tankless water heater that we will soon need to install.  Rick had added an outlet where they want to relocate the heater, and today we bought a large plywood panel which we will install so they have a place to mount the new system.  That will save them time and us money. They will come back at a later date to install the new water heater.

A new soil stack and additional drains
await the installation of our new tankless
water heater.

Ironically, the plumber had mentioned that the hose from our water softener was slightly crimped, and that since he put in a new drain system when he put in the new soil stack, that we might want to re-plumb the water softener unit with CPVC so the unit would not have restricted flow.  OK.  Good idea.

At 4:11 this morning, our water softener kicked in to recharge.  We both woke up and both heard a strange noise coming from the basement.  Rick went downstairs and found a flood: the water softener hose had blown off, and it was spewing water everywhere!  So there we were, reattaching the hose, mopping up water, and peeling back soaked carpet in the laundry room in the wee hours of the morning.  Such adventures!  Was it coincidence that the water softener just happened to blow its hose the day after the plumber mentioned it?  Had he touched it when he noticed it and jiggled something loose?  Was it just that old and under that much pressure that it finally gave way?  Who knows.  All we do know is that the clamp Rick put on the hose will keep it in place until our remodeling upstairs is complete so we can re-plumb the softener downstairs.  All in good time...
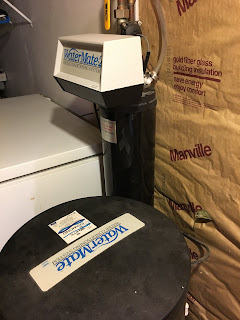
Note the clamp that holds the hose in place
at the back of the water softener.

This morning we both wanted to install the large pantry cabinet that we had somewhat put together yesterday after the plumbers left.  We added the face frame and spacer molding, and then we screwed the cabinet to the wall.  It is level and plumb, so we are happy with the results.  Rick tried some cabinet screws to attach it to the wall, and miraculously, we actually found the studs in the wall! (With these older homes, one never knows exactly where the studs might be placed.)  Six screws later, we have a secured cabinet that probably will withstand a EF5 tornado.  It's not going anywhere.

The large pantry unit secures storage in the
corner of the room.  This picture was taken before we
added the face frame (resting against the wall) and
attached the whole thing to the wall.

Rick really wanted to continue installing cabinets, but he faced reality and knew that finishing the newly plumbed laundry wall had to come next.  He added bracing between the studs so we would have extra places to secure cabinets.  Then, while I completed my Friday cleaning chores in the rest of the house, he stuffed Safe and Sound (fire resistant and sound-barrier) insulation in that wall.  The insulation was nasty stuff with which to work, but in the end we think it will be worth it.

Sound-barrier insulation will hopefully make running the laundry
fairly quiet in the rest of the house.

We are going to add a Vroom central vac component to the lower cabinet on that wall, so Rick extended the connection for that system.  Right now it hangs out about a foot from the wall, but once the cabinet is installed the system will rest inside the cabinet and will provide me with a quick way to pull out a 24 foot hose.  That will give me a easy-to-use, convenient vacuum for the laundry room, kitchen prep area, and back door.

After he finished that, Rick took measurements because there were several drywall cut-outs on that wall: outlets for both the washer and dryer, a dryer vent, the washer water supply box, the regular light fixture switch box, and the Vroom piping.   In the end, the drywall cut-outs worked fairly well, and the wall is now up.  Two hours later, Rick had the seams taped and mudded.

It's a wall! Another coat of mud, then primer and paint, and
no one will ever know that it was not always there.

While he was doing the mudding, I prepped the garage for tomorrow's task.  When he adds a second coat of mud on the new wall, I will stain the three wall cabinets and one base cabinet that will surround the washer and dryer.

Then, while everything dries, we will continue with the task of installing the cabinets on the west wall in that room.

A little bit each day.  We work long days, ache for our efforts at night, but feel satisfied as we continue to work toward our goals.


Tuesday, August 14, 2018

Cabinets, Circuits, and Cuts

We continue to make progress on the renovation of our den into a laundry room.  We want to get the cabinets on the west wall of the room complete so that we can hang them before the granite people come in to measure for the countertops.  To that end, we have focused our attention on those cabinets.

I joke that the main "pantry" cabinet -- which will house my sewing machine, laundry baskets, and some of the larger pots and pans that always are too large to fit comfortably in kitchen cabinets -- looks like an elephant's coffin.  It is tall and wide, but in the end that is the size that I want for the room.

Rick attaches the back to the pantry cabinet.
One side is longer than the rest in order to fit
the entire structure into the room.  An additional
box will be slipped onto the top.
Once we had that built, we hauled the rest of the west cabinets out to the garage so we could stain, seal, and varnish them.  We finished the staining two days ago, and yesterday we put a coat of sealer on the wood.  This morning we worked together to get the first coat of varnish on those cabinets.  We have to leave 24 hours between each coat for each to thoroughly dry.

The garage is filled with cabinets that we are working to finish.

One of the base units will have drawers for
office supplies and files.

Tomorrow we hope to lightly sand the varnish coat, wipe them all down, and then put on the second coat of varnish.  Hopefully, that will be enough for them.  Of course, the fun of hanging the cabinets still awaits us.  I hope that I am strong enough to help Rick get them all up on the wall.

While the sealer dried yesterday, Rick tackled the electrical components of this remodel.  He connected the washer circuit to the main electrical box in the basement.  He also brought over the wire for the dryer.  That connection was just waiting for the breaker that he purchased at Home Depot about an hour ago.  I am sure that the dryer will be hooked into the box before this day ends.

"Now where is that electrical tape?" Rick fished
the wire up the wall so he could move the
electrical outlet above where a base cabinet will rest.

Then he went into the new laundry room and worked with the existing electrical outlets.  He removed an old telephone/ cable outlet.  He changed all of the old-fashioned outlets into more modern square ones that match the rest of the house. He moved one outlet that would have been behind the new lower cabinets up the wall so that I will have access to an outlet between the upper and lower cabinets.  Two of the outlets on that wall will remain in their current positions since they will be under the desk.

Rick also fished an internet connection wire through the wall so I will be able to hard-wire my computer once it is on that desk.  We are going to see if I like having my "office" there instead of in the guest room.

The cut down heating grate fits well against the wall.
Another chore yesterday was making a heating duct grate fit into the opening.  We used to have two grates that were placed over the duct openings, standing against the wall.  Sadly, once my dryer is in the room, that grate would interfere with the dryer's placement and my ability to open the drawer below the dryer.  To remedy that problem, we purchased a floor grate that Rick had to cut down on one side so it would fit against the wall.  That took a bit of time, more than one cut for refits, and duct maneuvering, but in the end we have a grate that matches the floor and that will keep things from falling into the duct.

Our final work on the room yesterday was to look at samples of shades for the two windows in the room.  I love having the big windows, but covering them has left us with a quandary. Do we use white to match the appliances?  Do we go with a brown to match the cabinets and woodwork?  Do we try to find a shade that matches the paint on the wall?  In the end, we just ordered out eight samples to see what will look the best in the room.

Each day we move forward a little more, but we are far from finished.  However, in the end I think we both will enjoy our new room.

Thursday, August 9, 2018

The Last Cut

We started the morning by finishing our installation of a new central vacuum canister in the basement.  We wanted to get the new vac installed so that when we get the cabinets in the new laundry room, we can add a Vroom vacuum canister in one of the lower cabinets.  (If you do not know what I am talking about, check out "Vroom vacuums" online.)

Our Vroom canister will be placed in a position where I can easily sweep up anything in the laundry/ craft room -- including dryer lint and yarn from the loom -- and anything that spills in the kitchen or is tracked inside through the garage door. We used to have a vacuum port in that position, so now I will have a whole unit available instead of having to haul out the big vacuum hose when I need a quick clean up. Now we just have to figure out what to do with the old (still working) central vacuum canister that is sitting in the basement.

After that, we started working on cutting up the four sheets of oak plywood that we picked up yesterday.  Dang, that stuff seems to get heavier with every sheet!  We had cut about two sheets when we received a call from Alise from the cabinet store about the cabinet doors that we wanted to order from them.  We dropped everything, changed into presentable clothes, and traveled across town to finalize that order.  We picked out the door style and stain that we are praying will match the stain we intend to use on the boxes of the cabinets.  The stain sample she had LOOKED like a match in the store, but lighting can do strange things to tints and colors.  We also chose some new hardware for the cabinets.  They will make all of the doors, stain and seal them, and drill holes for the European hinges and the new hardware.

From there, we stopped at The Granite Company to make a final selection of granite for the room.  We found a piece we both liked and had Jen put our name on it.  We arranged for a measuring time, and added a down payment for the stone.  We both hope that it will look great in the room.

Although neither of us felt like working on the cabinets any more today, we both knew that we had deadlines facing us.  We continued to measure and to cut out the last two pieces of plywood.  We came up one cabinet back short, so we used an older piece of oak plywood that we have had in the basement for a while.  I am sure that it will be all right since it is just the back of a cabinet that no one is going to inspect anyway.  We are to the point where if we have to cut something out of older wood, or we have to cut a small, hidden part across grain, we will do so if it is going to save us having to buy more wood.  Enough is enough, even!  Yes, we are saving thousands of dollars by doing most of this ourselves, but the wood, granite, and hardware still are far from free. Once we were finished, Rick said, "That was the last cut!"

Tomorrow, we will see how far we can get.  We have to pause for a bit to help Lindsay and Christopher take down part of their deck ceiling.  Then we will be back to constructing cabinets.  I hope to take time to mow the lawn while Rick preps the sides of the upper cabinets on the router, and there is always laundry and other cleaning chores inside that are a part of my Friday routine.

One day at a time, one task at a time.  Each day we continue to move closer to the time we can say, "Oh, come and see our new laundry and craft room!"  That day will come, perhaps not a quickly as we would like, but it will come.

Sunday, August 5, 2018

Cabinet Creations

For the past two days, Rick and I have been working in the garage "workshop" as we start to assemble the cabinets for the laundry room.  We knew that once we cut the component parts from the plywood, we would have to work quickly to get everything assembled before the lovely humid weather (even though we are storing the parts in the air conditioning indoors) would cause everything to warp.  We are working as fast as we can.

On Friday, we assembled the first base cabinet.  Because we were not sure exactly what the best way was to put it all together, we spent about three hours just getting everything in place.  We found one small (1/4 inch!) error in one piece.  Rick's math was correct on the drawing, but in transferring that measurement from one drawing to the next, he added a quarter inch.  Thankfully, it was ADDED, which meant that we could easily correct the problem by trimming a quarter inch off one piece.

Today we were back in the garage to try to beat our assembly record.  My goal was to get at least two base cabinets constructed today.  In reality, we constructed the other two large base cabinets and the smaller base cabinet that will reside next to my washing machine.  The second cabinet took us a little under two hours to put together, and we assembled the third cabinet even more quickly.

Rick had to cut some of the pieces for the smaller cabinet, so that took a little extra time; however, by noon the two larger cabinets were finished, and by 2:00 p.m. all three cabinets were safely back in the cool indoor air.  (The temperature in the garage, sadly, was in the high 80s.)

The boxes for the four base cabinets await final placement in the new laundry room.

At that point, Rick and I carried his router table upstairs so he could cut the dados in the sides of the upper cabinets.  While he experimented with how those cuts would go, I came into the house to do a little laundry and a little baking.

Stephanie arrived last night so she could spend a couple of days in Door County with Lindsay.  One of her co-workers had given her a huge zucchini, so she gave it to me yesterday with a request to turn it into bread.  While Rick figured out how to route dados, I turned the zucchini into eight mini-loaves of zucchini nut bread.  I had a little batter left over, so I used it to make some mini zucchini muffins.  After sampling a few, I made Zucchini Man and sent Stephanie a picture. I am sure Owen will get a smile out of it before his Grandpa eats the muffins.  I still have enough shredded zucchini left to make eight more mini-loaves of bread.  I will do that tomorrow evening or on Tuesday.

Zucchini Man... before Rick ate his nose!

When I finished with the bread, I ventured into the garage only to discover a delighted Rick who not only figured out how the dados would work with the upper cabinets, but he also had gone ahead and cut all of the joints.  He was about to finish dry-fitting an upper cabinet when I joined him. I had to persuade him that at 4:00 p.m., he had done enough for one day.  The upper cabinets will be our next project on another day.

We are taking tomorrow off to join our family in Door County.  We need a rest, and I am sure that no mischievous elves will steal into the garage to assemble the cabinets while we are gone.  Work always waits for a person to return.

We accomplished more than either one of us thought we would today, so we both are happy with our progress as we transform our old den into a functional laundry/ craft room with lots of storage.

Thursday, August 2, 2018

Doors, Dirt, Festool, Face Frames, and Fan

We have been so busy working both inside and outside of our house that I have not had much time to update this blog for the past week. We continue to make progress putting our disheveled house back together.

I'll start with the outside.  Lat week Steve of Economy Stump Removal came and took out the three stumps in our back yard.  Then he "followed the roots" of the main huge tree and pretty much made most of the back yard look like an angry ocean in the midst of a hurricane.  We were not upset about that because we needed to get those roots out, and we knew that Travis would come and smooth the yard out with his tractor.

Steve runs the grinding machine to remove
the large cottonwood stump in the middle of the back yard.

Steve and his son, Kyle, hauled away a huge trailer full
and a truck full of wood chips.
On Monday of this week, we noticed that water was standing in some of the deeper ruts in our neighbor's yard, causing a muddy, smelly mess.  To solve that problem, Rick shoveled 10 wheelbarrow loads of dirt from the back yard into the neighbor's yard to our south.  I distributed and smoothed the so the rain would not settle in deep puddles anymore.

We tried to be good neighbors by filling
in the ditches in our neighbor's yard.
The next day, while we were out of town, Travis came with his tractor and somewhat leveled the back yard. He wanted to do this so the yard would have a chance to settle before he returns at the end of August to add topsoil and grass seed to our yard.  He smoothed out the neighbors' yards to the east and to the north, and he spread out grass seed in the hopes that some of it would take.  Thankfully, we got a good rain last night, and today it has been misting/ raining all day.  That is just what the seed needs.  I hope that at least some of it takes and fills in.

Inside the house, Rick finished the pocket door and hung it.  We now will be able to close off the noise in the laundry room when we run the washer or the dryer.  The door matches all of the others in the house, and I think it looks really good.

Our new pocket door as seen from the kitchen.
We discovered when we took down the door molding to that room that the paint next to the door in the kitchen was peeling away from the wall.  We use Benjamin Moore Aura paint, so we knew that cheap paint was NOT the problem.  I was able to peel all of the paint off that wall in big sheets like one would do to remove old wallpaper.  Rick took one of the sheets to the paint store, and the owner told him that the problem occurred with the original plaster job of the house.  Apparently, the plaster was not mixed properly, leaving an unfinished and chalky surface.  Paint will not stick to that forever.  She told us to wash the wall with TSP, rinse it well, let it thoroughly dry, and then prime it with an oil-based primer.  Once that primer dries, we can paint the wall with a latex paint.

Once the pocket door was in place, we were able to buy, cut, and install the drywall in the laundry room on that side of the door.  We are still waiting for the plumber to install what needs to be done on the other side of the door, but at least we can finish this corner of the room.  That will allow us to start to build and install cabinets.
Drywall completes the pocket door wall. Rick
has since plastered the corner.

Yesterday I washed the wall twice with TSP, rinsed the wall twice with water, and we are letting it thoroughly dry.  Rick bought the oil-based primer, so that will be our next step.  We want to repaint the kitchen anyway, so we will start with that wall and with our new paint color.  Neither one of us really wants to paint the kitchen RIGHT NOW, so that task may just have to wait in line until we finish other jobs.

Thank God the wall I had to wash down was
not too large!  Once this dries, we can prime and
paint it, but that will force us to paint the entire kitchen.

We received a call from Shawano Wood Products that the 1 1/2 inch red oak that Rick ordered had arrived, so we took a drive to Shawano to pick it up.  Today we spent the day building the face frames for all of the cabinets in the new laundry/ craft room.  We bought a new Kreg K5 pocket hole screw system, and it worked beautifully as we put together the face frames for the cabinets.  I even drilled some of the holes... until the collar slipped on the drill bit and I did not notice it, so I ruined one piece of wood.  That was the end of my pocket hole screwing career.

Face frames for the lower cabinets line the wall.  The gap
in the middle will be where the desk will go.
All of the face frames await further construction
as we build the cabinets.

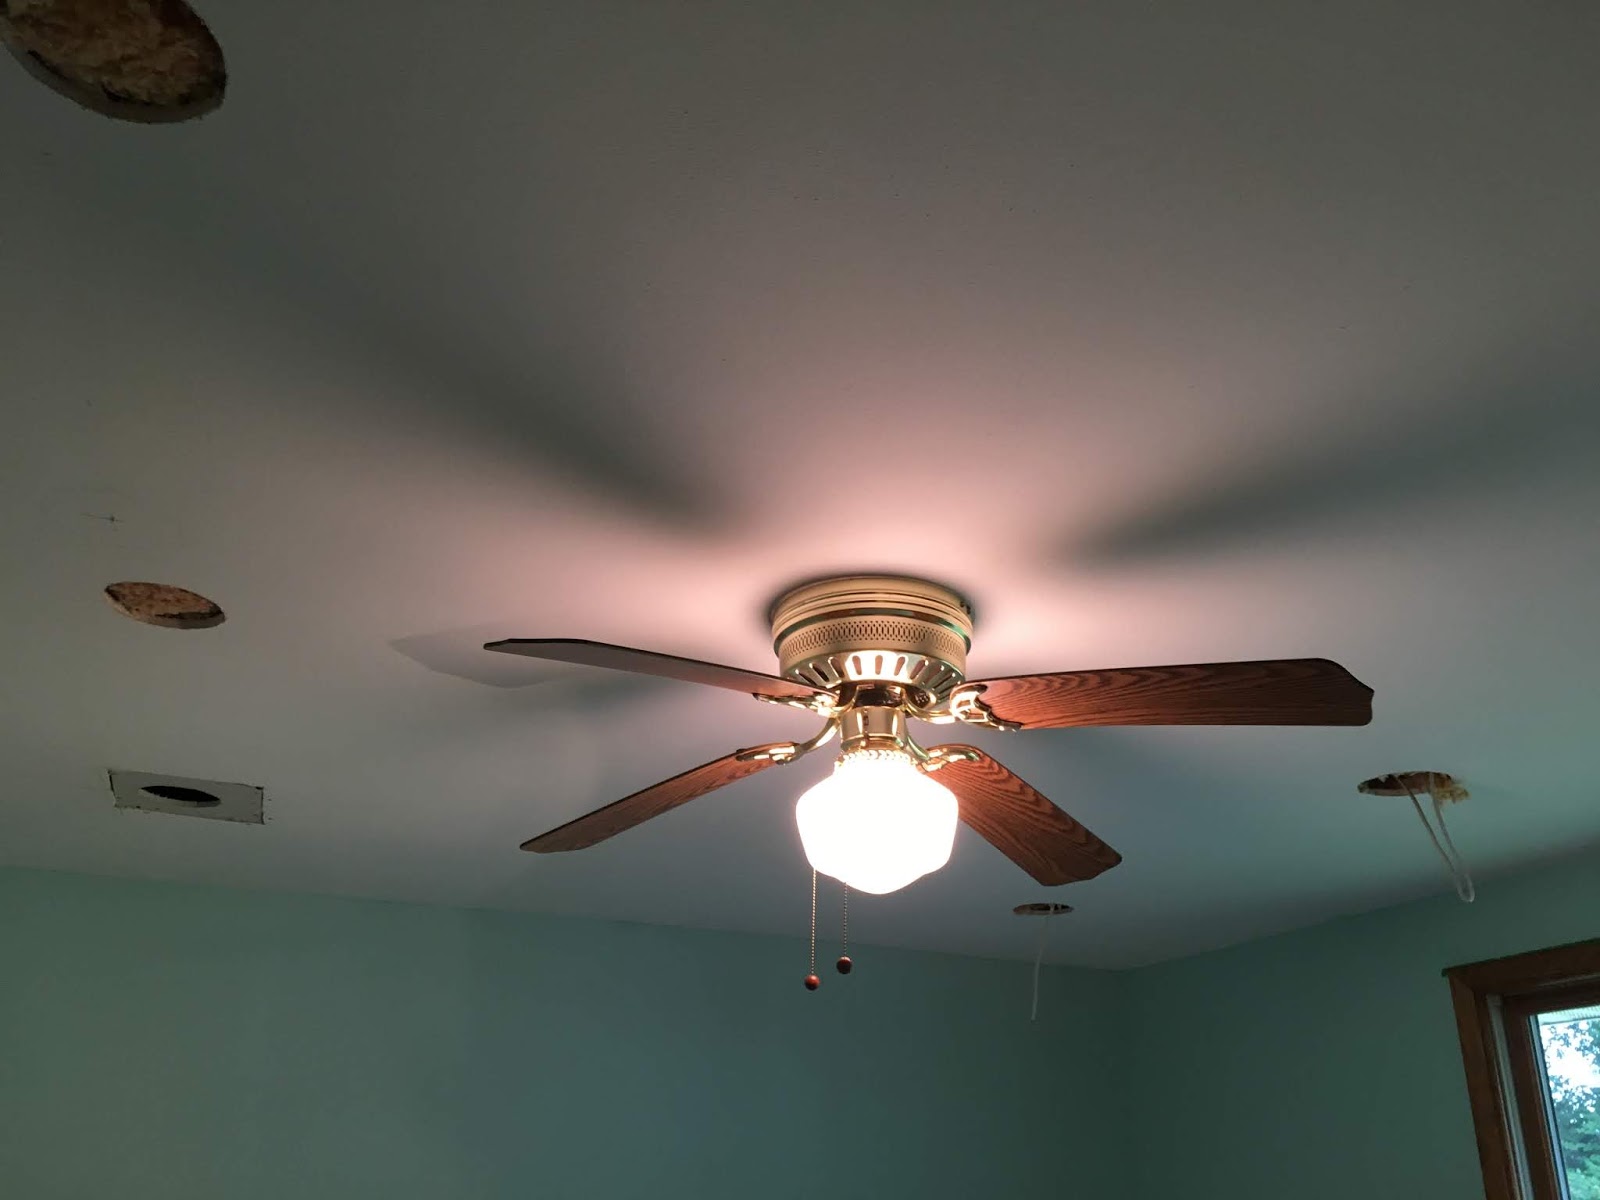
Our final task of the day was to install the new ceiling fan for the room.  Originally I did not want a light in the fan, but Rick and I found a fan that we both liked while we were at Lowes' in Appleton.  We like the sleek look to the fan, the size, and the fact that since it is remote controlled, we have no chains hanging down into the room.  The fan was a wiring nightmare, but it now is up and works well.

Before...
and after we installed the new ceiling fan.

We have had a very successful day, and we certainly are looking forward to dinner and resting this evening.  Tomorrow, if the rain ends tonight, we will be off to buy plywood so we can make the boxes to the cabinets.  For tonight, though, I am just going to rest.


Saturday, July 21, 2018

Let there be lights!

After almost killing ourselves each day this week, we are finally finished with the garage renovation.  The ceiling is painted with two coats of flat white paint, and the fire code walls all have two coats of the pale yellow paint we chose. We still have to install the vinyl baseboard, but that has to wait until the paint on the walls thoroughly dries.  We'll get back to that task later this summer.

Rick has moved on to working on the new first floor laundry/ craft room / office.  He finished the framing for the pocket door, and we picked up the solid oak, six-panel door a few days ago.  Right now he is staining the door and getting it ready to hang.

Today Rick was up before 7:00 (I "slept in" until 6:57), and we both were working in the laundry room before 7:30.  We planned where we wanted to install the ceiling can lights, and then Rick started to draw the plans on the ceiling and to cut the drywall where the cans will go.

Rick cuts the first hole for the seven can lights
that we installed today in the new laundry room.

Three down... and wired... four to go.

The first three cans went well.  We even were able to fish through the wire from one to another with few problems.

Then we moved to the other side of the room.  The first cut did not go well because we ran into some unexpected 2 x 4 framing in the attic.  Duh!  Of course!  We used to have a corner fireplace in that area, so the added framing was supporting the structure of the fireplace.  We removed the fireplace years ago, but the framing remained in the attic.

A quick trip to Home Depot showed just how distracted we were.  I elected to stay in my work clothes, but Rick made a quick change into some "good clothes" for the store.  The only problem was that he got distracted in the middle of the change, and ended up with some interesting footwear.  Neither of us even noticed until we were walking OUT of Home Depot.  Ah, well, maybe Rick will start a new working man's fashion trend.

OK, so they did not quite match...

After adjusting the placement of that mis-cut can -- and patching the errant hole with a new square of drywall-- we were back on track, or so we thought.

We decided to change the layout of the lights on that side of the room since that is where the cabinets, desk/ sewing table/ and storage unit will be.  We moved the lights to better accommodate the tasks that will occur on that side of the room, and are we glad that we did!  When we moved the lights, we double-checked where rafters might be and discovered that our original plan would have run into rafters in three of the four planned lights.

With the holes all cut, we moved on to fishing through more wire.
With the new plan intact and the holes successfully cut, we once again pulled the wires with little trouble.  Then Rick went into the attic to connect the wires to the junction box that an electrician friend of ours had wired years ago "in case you ever need some extra lines."  God bless Mike for his brilliant idea to run those lines from the attic to the electrical box in the basement.  He made our job today 1,000 times easier.

By 5:30 this evening, we had seven brightly lit and functioning new can lights in our laundry room.

Tape on the floor marks where the new cabinets
will lie.  The lights above will give us task lighting
for everything we hope to accomplish.
Seven lights will give us the illumination we desire, and the fan
in the middle will be replaced with a non-lighted, white fan
for ventilation.

That was one more major project, and we both are happy with the results.  Each light can be adjusted from 2500 - 5000 K of light.  We set the lights at 4,000 K (cool white), and that will give us more than enough light to work at the computer, to sew, to weave, and to find the lightest of stains on the laundry.  If we leave the blinds up, we also can light up half of the back yard.  I think we have enough light for anything we want to accomplish in that room!

Sunday, July 8, 2018

Inside Jobs

In addition to watching the trees come down in the back yard, we also have been keeping busy with inside jobs.

As I mentioned earlier, we are putting 5/8 inch firewall drywall in the garage.  We have lived here for 28 years and never noticed that there was nothing between the garage and our house except 1/2 drywall on the interior walls, a bit of insulation in the walls, and 1/4" paneling inside the garage.  That seems to have been the way of building houses in this neighborhood in the 1970s since many homes still have their garages lined with brown paneling.  While we painted the paneling a light yellow years ago, we never made any other improvements.  We were long overdue to bring the house up to code by adding the firewall drywall in the garage.

For the last couple of weeks, Rick has been hanging, taping, mudding, and sanding that drywall.  Yesterday we actually were able to put a primer coat of paint on the south wall between our garage and living room.  By tomorrow, we hope to be able to finish the sanding of the east wall between our garage and family room.  Rick worked on it early this morning, but it just became too hot outside to continue that task.

We stated the day delightfully by meeting Lindsay, Christopher, and Owen at the Botanical Gardens.  They have a Lego Exhibit there staged throughout the gardens.  What amazing things engineers and artists can do with just Lego blocks!  Each exhibit listed a fact about what was constructed and how it was connected to the garden.  The placard also listed how many blocks (literally tens of thousands) were used in each exhibit and how many hours (think: hundreds) the builders took to complete each work.

This purple peony-- complete with a bumble bee--
was at least four feet across.

We were trying to figure out what kind of internal
structures were used to keep the Lego hummingbird
suspended above the yellow trumpet flower.

Workers used tens of thousands of Legos to build this magnificent peacock.

Even two gardeners and their wheelbarrow
were constructed of Legos! 
Once we came home from the gardens, we decided to get started on renovating the family room into our new laundry/ craft room.  Down came the crown molding, off came the baseboards, registers, outlet covers, and window coverings.
The dark family room awaits renewal.

We start the transformation.  The blue will work much better
for a laundry and craft room.

After Rick and I cut in around the edges of the room, he really started to transform it by rolling on our new light aqua coat of paint.  The color is Antiguan Sky, and the room definitely will need two coats of paint to cover the dark umber that has been on those walls for many, many years.

I think that I am going to love this room when we complete it.

I am pleased with the results so far.  The room looks larger, brighter, and more clean.  We needed a change, and this certainly is creating a new look for that corner of the house.  With the trees gone in the back, we will get more morning light in that room, too, so many elements are affecting the look of the room.  I hope it becomes a bright, welcoming place to not only do laundry, but also to create new items on the loom, on my sewing machine, and on my computer.  We have a long way to go yet, but if that room turns out as well as the laundry room at Gladys did, I will be very happy indeed.